Picture Book : “Layout Process”

“Layout Process”
for Illustrating a Picture Book
Below I’ve shared tips for the “layout process” for Illustrating a picture book. These suggestions are my takeaways from working on various projects, taking classes, and personal experiences. It’s the groundwork before working on the finished artwork (my favorite part!)
Step 01: Manuscript to Thumbnails
POINT 01: Paginate the Manuscript
I’ve seen some people jump into thumbnails immediately, but I like to first copy (or retype) the manuscript into Microsoft Word. I then play with pagination in the document. This takes out some guesswork when I get to the thumbnails. I feel like it warms up my brain and familiarizes me with the rhythm of the text. I like to do a few versions, but I know it will change once I start sketching thumbnails.
POINT 02: Do WAY more versions than you think!
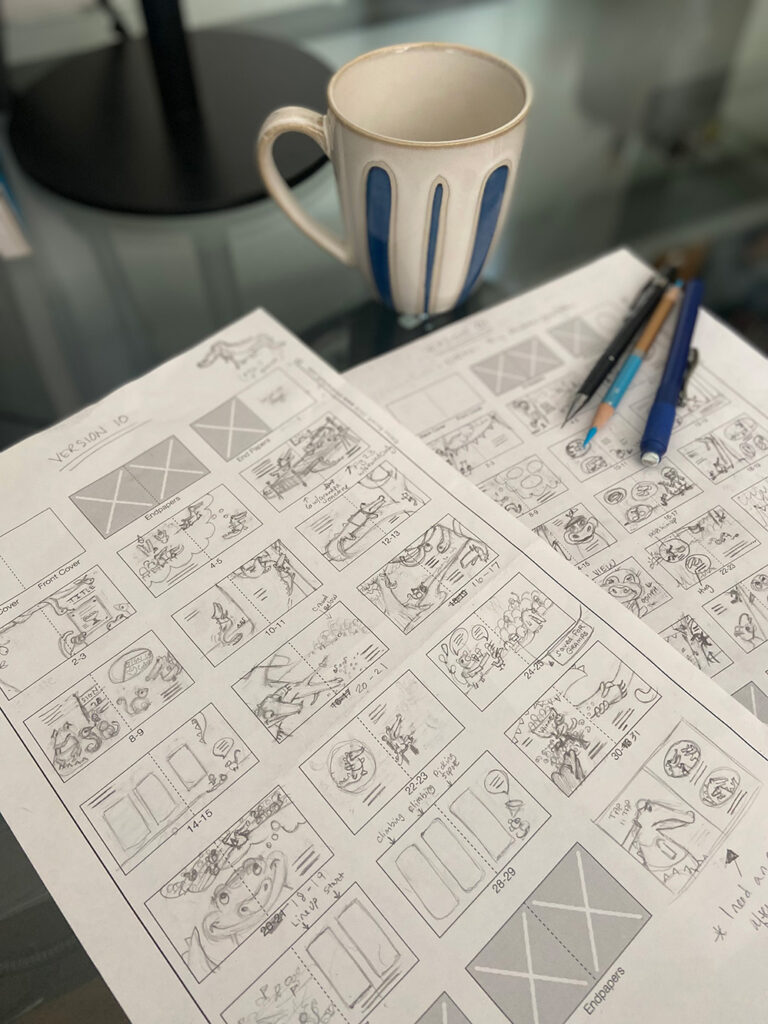
I print out many 32-page picture book thumbnail templates…MANY! Then, I pour myself a nice cup of coffee, find myself a quiet corner in the house when the kids are at school, and sketch out my first pass (expecting it to be the worst version) of what I think the whole book would look like. It’s like doing some stretches before a performance…I have to warm up (yes, I used to do ballet and jazz). I put my first version aside, and do many, many more! I find my best ideas sprinkle in around version 6.
POINT 03: Decide your Orientation
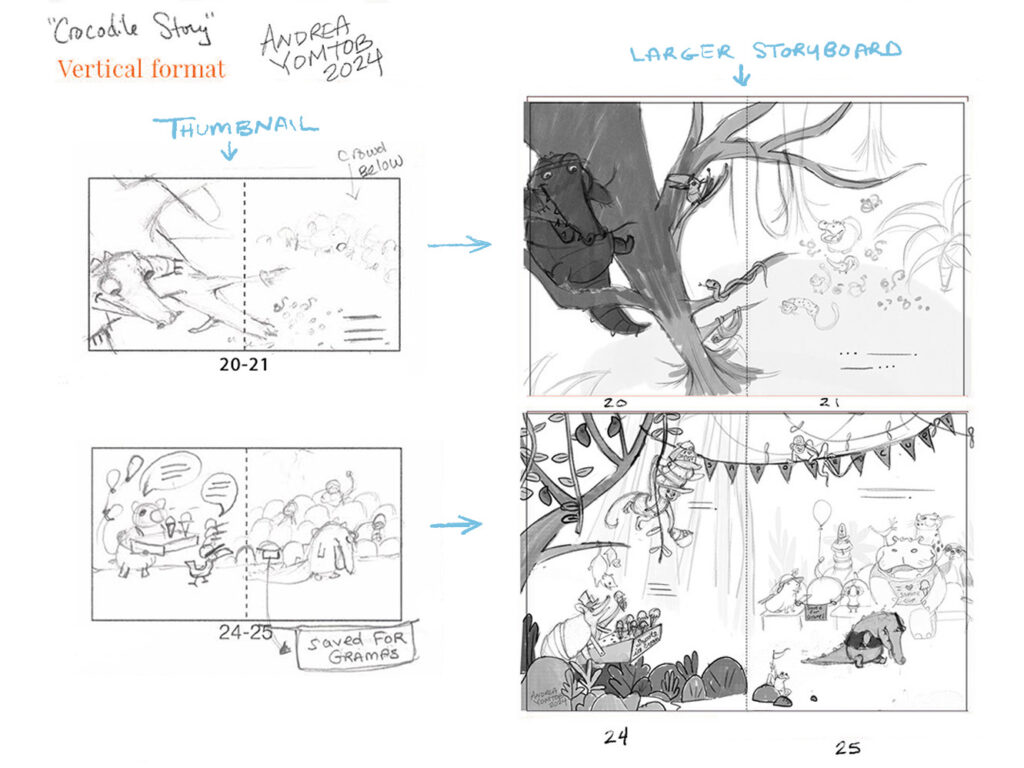
As you probably know, there are a few different orientations that a picture book can take. For example, Vertical, Horizontal, and Square. So, I choose which one I want based on various reasons. In my case, I’m drawing a crocodile who climbs trees, so I’m going with a vertical format.
Step 02: Larger Storyboards
POINT 01: Stay Creative and Loose
My thumbnails, by the way, are like cliff notes. They are quick, and look like scribbles in some cases! (as you can see in the picture above) But, this helps me focus on telling the story instead of worrying about the artwork. I maintain this headspace when I enlarge them too. I can be detail-oriented, but, I learned this is not the stage to let that attribute come through. The quote I learned from Nina Rycroft that has stuck with me was “If story is King, then clarity is Queen.” I highly recommend taking her online courses, she is SO talented! I worked on this story in her course.
POINT 02: Befriend the characters
What does the main character like to eat for lunch? Do they have a short temper when they don’t get what they want? These questions probably sound silly, but I like to dive into my main character when enlarging storyboards. It helps me capture their personality and decide how they interact with other characters. I’ll do character designs and play with poses.
POINT 03: Don’t reinvent the wheel
There are heaps of references online for page layout. I like to take time to explore and be inspired! I love Pinterest since I can save images and categorize them. Then, I’ll reference them later on. By no means do I copy, but there are great ideas for a starting point. I put my spin on it, so it’s uniquely mine!

Step 03: Final Storyboards


POINT 01: Character Interaction
Have you ever read a picture book to a child and see them point out all sorts of discoveries in the art? This is one of my favorite parts of illustrating. I love putting little “Easter Eggs” among the art for readers to find. This includes reminding myself to have side characters interacting in some fun way.
POINT 02: Be Generous with Space for Text
When refining the illustrations, I think carefully about text placement, but I often don’t give it enough breathing room. So, I’ve learned to be far more generous with the space surrounding the text.
POINT 03: “Shapes” on the Page
I think about the “shapes” of my pages in the “Thumbnail” and “Larger Storyboard” phases but give them a rethink before the final. I’ll scan my enlarged storyboards into Photoshop and lay them out in the 32-page thumbnail template. This way I can view them on a smaller scale. I’ll shade the “shapes” with gray which helps me see the variety of layouts clearer. I’ll go back and make changes if there isn’t enough variety.
POINT 04: Color Play!
This piece is still in progress, but this photo shows some colors I’m playing with. I like to try many versions.
That’s It!
So there you have it! Those are my steps when initially laying out a picture book. Of course, there are many ways, but I wanted to share what works for me.
In the next post, I’ll outline my approach to final illustrations and fun medium experimentations. My favorite part!